
If you’re using an older Windows computer, you’ve undoubtedly noticed that you’re running low on disc space. You’ll recognise the symptoms: a hard drive that’s at or close to capacity will slow down, and your apps will freeze and crash more frequently. It’s an annoying situation that makes even the most basic PC tasks seem impossible to finish.

Is it necessary to clean my drive?
Cleaning up your drive is the obvious solution, but choosing which things to remove could be challenging. Fortunately, Windows 11 makes it simple to remove unnecessary files and free up computer space. Windows 11 includes a few settings you may set up to swiftly remove temporary, system files, and outdated downloads you might not require in place of downloading third-party software to clear up disc space.
Additionally, Windows 11 will assist you in determining what to remove in order to enhance the speed of your computer, so don’t worry if you’re concerned about getting rid of vital files.
How to make Windows 11 automatically free up storage space
Viewing Detailed Storage Categories in Windows 11
Navigate to Settings > System > Storage on your Windows 11 machine. Give your computer a few seconds to examine your data storage if this is your first visit to this setting. Your total free RAM will be visible at the top of the page once Windows has gathered the necessary information. A breakdown of your storage, broken down into programs and features, temporary files, and other categories, can be found beneath that.
To conserve space, compress folders or the entire drive.
1. Choose Properties with a right-click on the Drive or the folder.
2. Press the “Advanced” button.
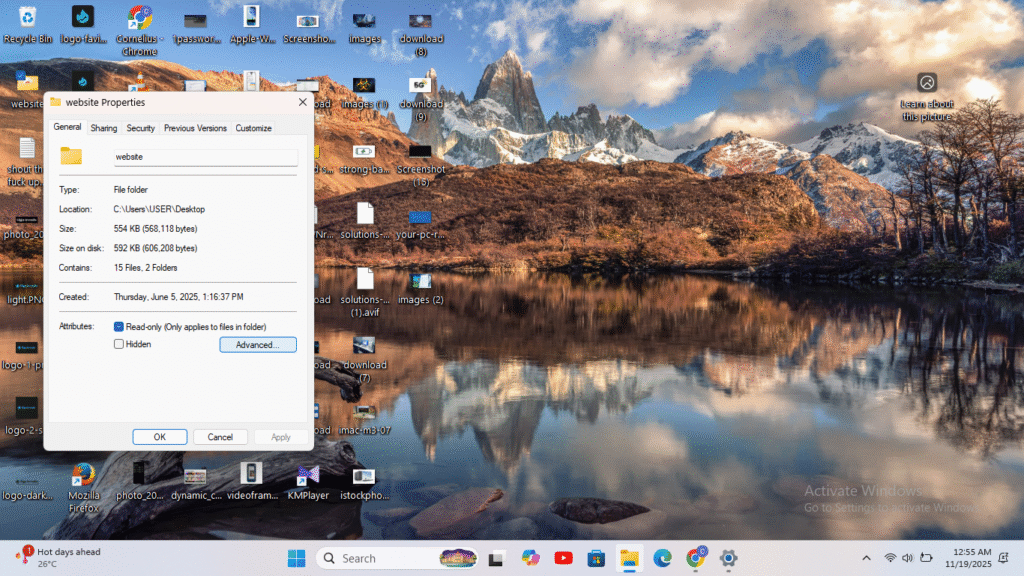
3. “Compress contents to save disc space” is a toggle.
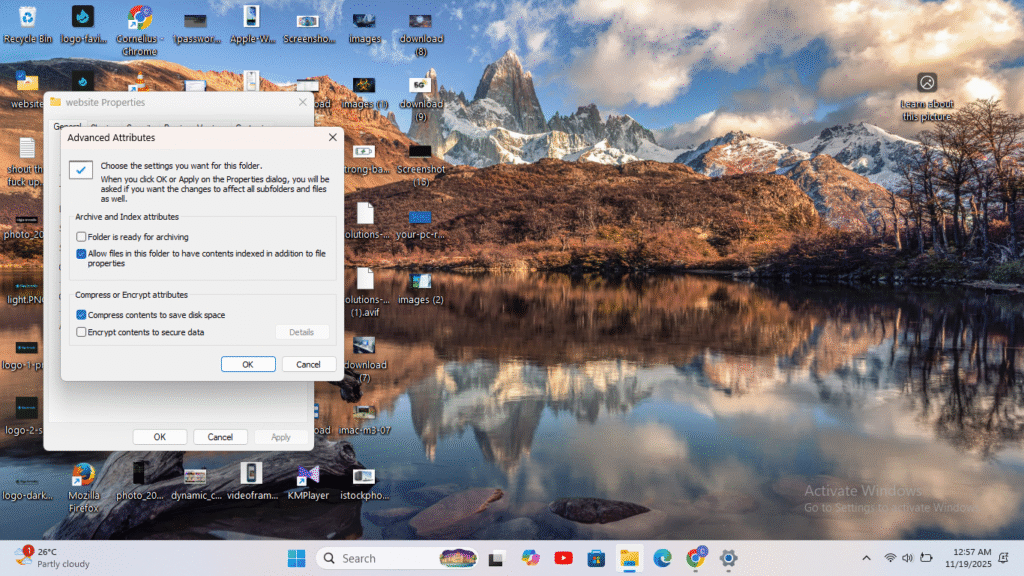
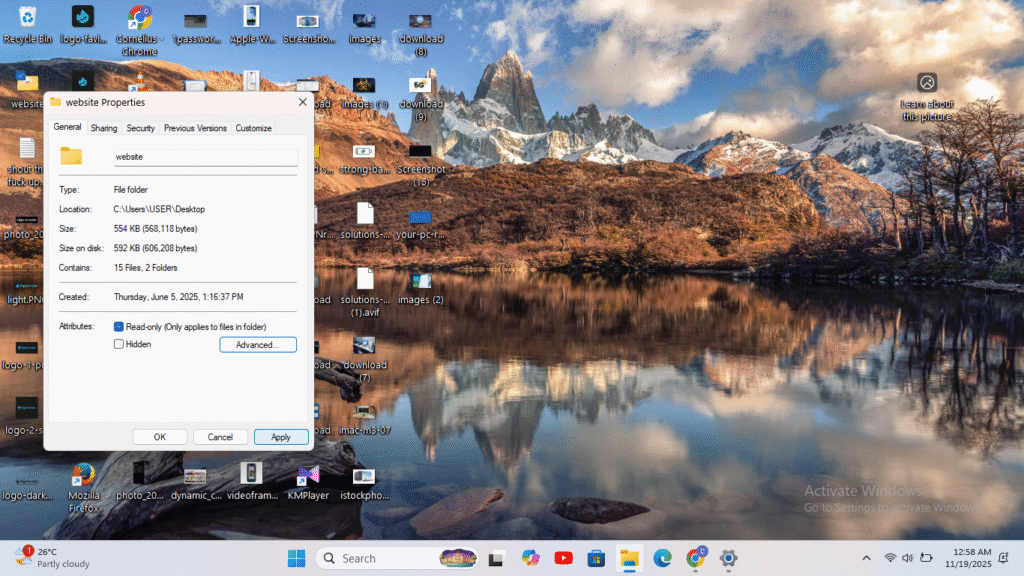
4. Select “Apply.”
5. Choose “Apply changes to this folder, subfolders.” and select “Ok.”
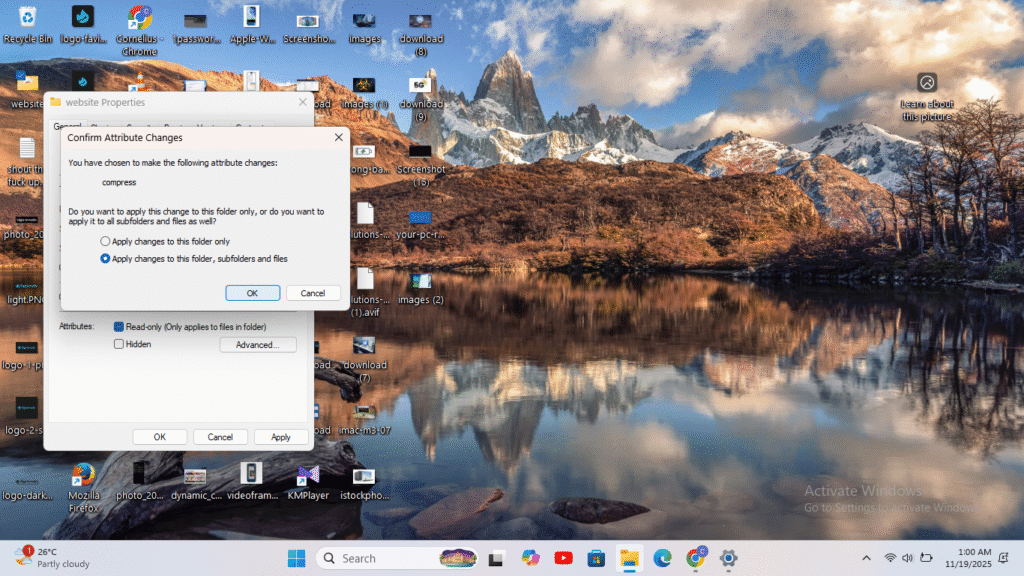
6. If you are asked for admin permissions, click Continue.
The amount of time it takes to compress this will now depend on how many files and directories there are. Hours may pass, and the outcome may be inconsistent.It just took some few minutes to compress a 2.3GB Documents folder, saving 0.28GB of space. But the system informed me that it would take more time to finish when I attempted to compress my entire drive!
Utilise the Storage Settings Menu in Windows 11.
If you’re using Windows 11, the Storage Settings Menu will display the precise amount of space you’re using for various kinds of data, including applications, documents, images, and even downloads in your Downloads folder. Granted, you wouldn’t want to remove all of your photos just because you have a lot of them. However, there are some suggestions in Storage Settings that you can heed.
1.Go to Storage under Settings.
2. Verify that Storage Sense is turned on. By automatically removing some temporary files, this feature helps you preserve disc space on a daily basis. Enabling it, however, will help the future more than the present.
3. Select “Cleanup suggestions.”

4. Choose which of the suggestions under Temporary Files and Large or Unused files you wish to remove. In my instance, I had a huge storage of unnecessary files in my download folder under Temporary Files. I therefore turned on the button to remove them and the tick next to Downloads.
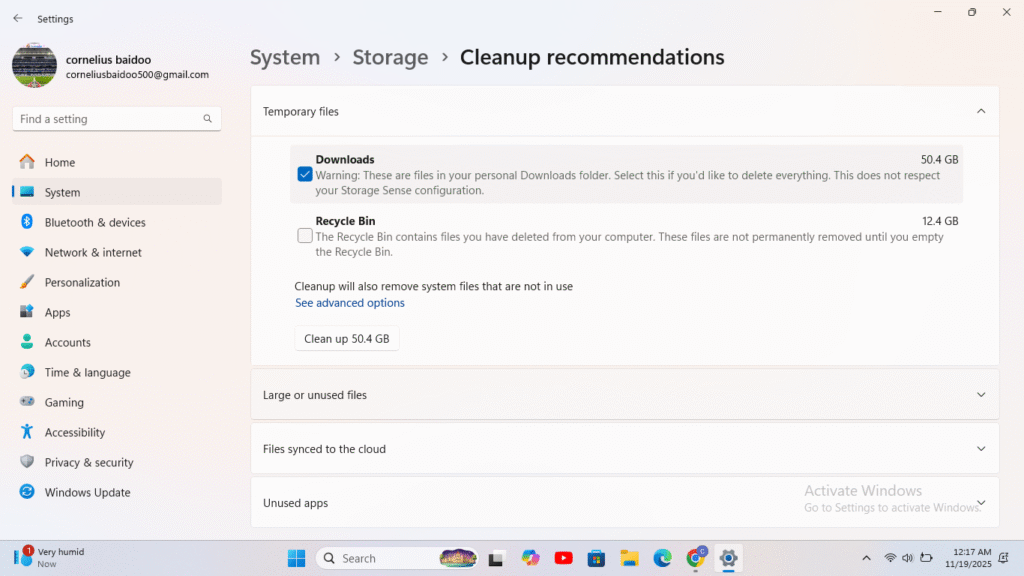
The largest file in the Large and Unused files area was a huge storage audio clip that I have programs on and I wanted to keep them, but the system didn’t identify many savings in my situation. Additionally, no unused programs or cloud-synced files were found.
Run Storage Sense frequency
Toggle Storage Sense on here to activate it. You can configure a number of features by clicking the setting: Run Storage Sense: You can run Storage Sense daily, weekly, or monthly, or when your disc space is low (by default). If a file has been in my recycle bin for too long, remove it: Select any day (by default). If a file hasn’t been viewed for more than: Never (default), 1 day, 14 days, 30 days, or 60 days, delete it from my Downloads folder. You may prevent any crucial information from being erased from your computer by using these Storage Sense settings to restrict which files are deleted and when.
To utilise the feature immediately, click Run Storage Sense now at the bottom of the page. Additionally, you may use Storage Sense’s Cleanup suggestions tool to remove additional files to free up space. When you click on it, it will analyse your system and suggest files such as temporary files, big or unnecessary files, cloud-synced files, and unneeded apps that you should manually remove.
Because it can target a lot more places and file types than Windows’ built-in capabilities, a dedicated disc cleaner utility is really frequently a better option. Third-party cleaners scan the entire system, including application caches, browser histories, crash reports, unused language files, and other hidden junk that Windows’ own disc cleaning tools ignore. In contrast, Disc Cleanup and Storage Sense primarily target system-related temporary files, update leftovers, and the Recycle Bin.
Uninstall Windows Features
1.Access the “Turn Windows features on or off” menu.
2. Deselect the characteristics you wish to omit and click OK.
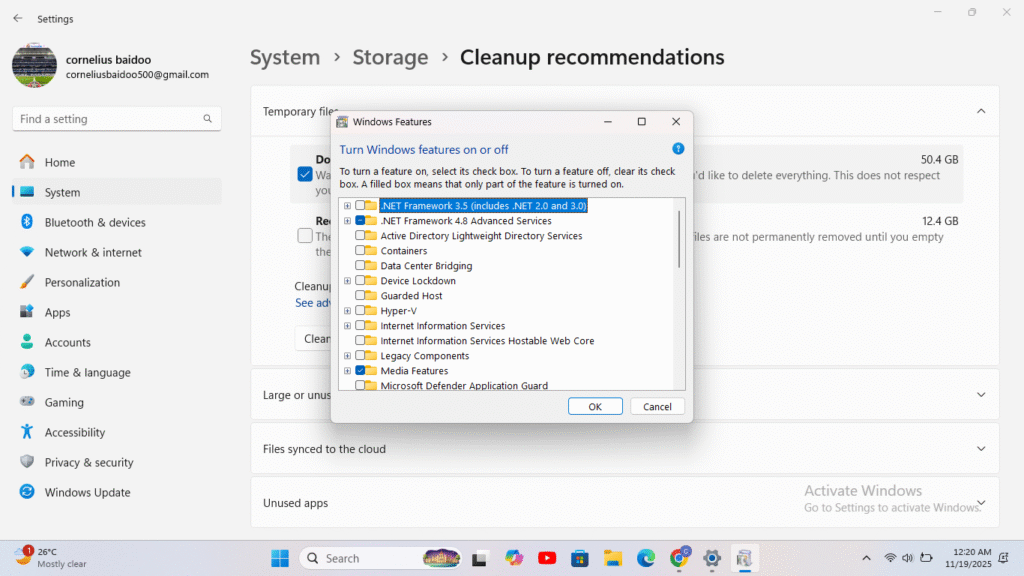
But most of these are very small, so you might need them.
Remove Applications You No Longer Use
Since it practically goes without saying, I put this space-saving technique for last. It’s a good idea to check your installed applications to see if there are any that you no longer require when you’re running low on space.
1. Go to Settings->Apps in Windows 10 or Settings->Apps->Installed apps in Windows 11.
2. Sort by app size. Big to Small
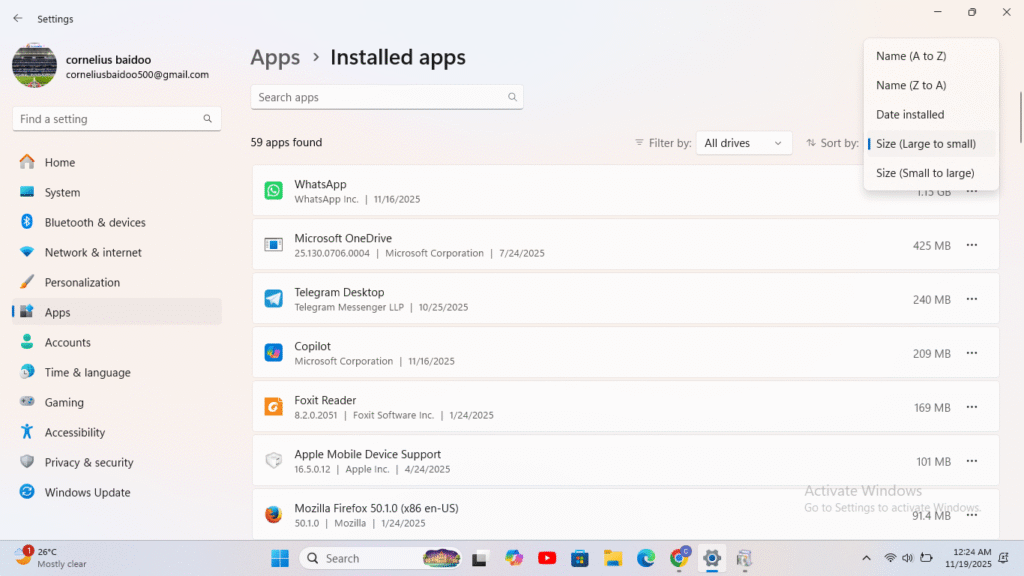
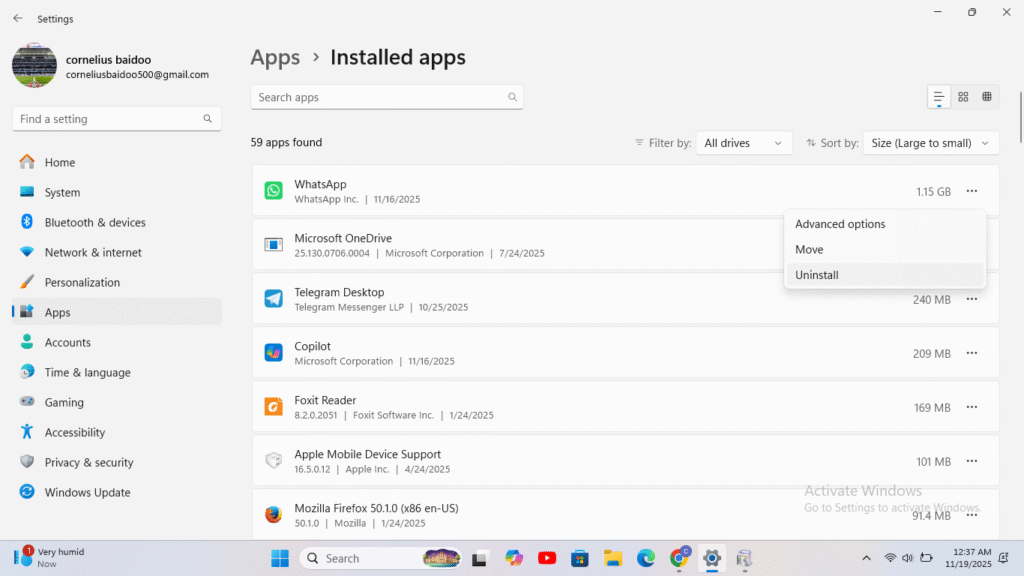
3. Click the Choose “uninstall” next to the app you wish to remove.
By removing the Windows Subsystem for Android, which I never use, I was able to save 1.27GB. Some of the most popular games nowadays take up more than 50GB, so you may save a lot more space if you have games on your computer that you aren’t playing right now. Not every one of the aforementioned strategies is worth the compromises. I only compressed one folder since I didn’t want to keep my laptop’s hibernation turned off and I discovered that compressing the entire disc would take too much time and likely affect speed.
Additionally, I discovered that I had more free space than I had anticipated after performing several of these procedures, such Disc Cleanup, which would indicate that more temporary files were deleted than I had anticipated.
Advanced Disk Cleanup Options Beyond Windows 11’s Built-In Tools
When it comes to cleaning up disc space on Windows 11, several of these tools also provide you more precise control. You can choose precisely which categories to clean, preview files before deleting them, and create deeper or more aggressive cleaning profiles. Flexibility and other features are further benefits. The built-in Windows tools just don’t offer secure file deletion, duplicate file detection, huge file analysis, and cross-application cleaning, all of which are supported by several disc cleaner software.
Additionally, they frequently enable customisable rules for automatic scheduling, providing you with more comprehensive hands-off maintenance than Storage Sense. A well-selected third-party cleaner offers more power, accuracy, and variety than Microsoft’s built-in alternatives for users who wish to recover the most disc space and maintain a clutter-free system.
Conclusion
All the measures or steps through are the best way for to create more space on your device . I only tried compressing one folder since I didn’t want to keep my laptop’s hibernation turned off and I discovered that compressing the entire disc would take too much time and likely affect speed. Additionally, I was able to know that I had more free space than I had anticipated after performing several of these procedures, such Disc Cleanup, which would indicate that more temporary files were deleted than I had anticipated. But after a concentrated effort, you will have available storage for your extra work, which is more than sufficient for my needs.read more on How to Recover Files and Fix a Corrupted Windows System (Safe, Step-by-Step)


