

Bringing in and sending out photos works mostly the same in the new Photos app as it did in iPhoto, but there’s one key difference during import. Plus, there’s now an updated sharing menu

Just like iPhoto, Photos for Mac stores your images in a single library file. To use your photos outside the app — whether for editing in another program or uploading online — you’ll need to export them or use the built-in sharing features. Similarly, to add new pictures (unless you’re using iCloud Photo Library and only shoot with your iPhone), you must import them. Here’s a quick look at how sharing, exporting, and importing works in Photos for Mac.
Sharing
To share a photo, video, or group of media, click the Share icon in the top-right corner. A menu will appear with options like iCloud Photo Sharing, Facebook, Flickr, Twitter, and Messages. If you’re sharing a video, you may also see Vimeo listed.

If you choose iCloud Photo Sharing, you can create a new album or add selected photos and videos to an existing shared album. You can then invite others to view or subscribe to the album. These shared items appear in the Shared section of Photos for Mac, but recipients don’t need the app—they can view the photos through a browser on iCloud.com.
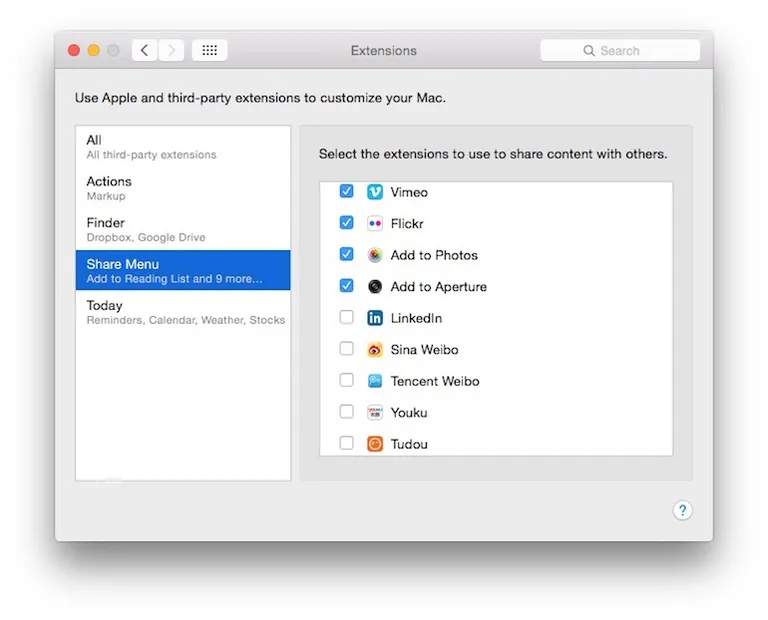
If you’re used to sharing through Google’s Picasa, you’ll notice it’s no longer supported. However, you can enable additional sharing options by clicking the More button at the bottom of the sharing menu.
Exporting Photos from Photos for Mac
Photos for Mac doesn’t include an “Open In” feature to directly send images to apps like Photoshop or Lightroom. Instead, you’ll need to export the photo first:
- To export, select the image(s), then go to File > Export.
- You’ll see two options:
- Export [X] Photos/Videos – allows you to choose file type, size, quality, and naming.
- Export Unmodified Original – keeps the file exactly as it was imported.
- Note: You must be in the Moments view to select multiple items for export. You can’t export entire years or albums directly without entering and selecting the contents.
Exported files are copies. The originals remain in your Photos library unless you delete them manually. Deleted items go into the Recently Deleted folder and are permanently removed after 30 days.
Importing Photos into Photos for Mac
- If iCloud Photo Library is enabled, iPhone photos sync automatically.
- For photos taken with a dSLR or other cameras:
- Connect the camera or insert the SD card.
- An Import tab will appear at the top of Photos.
- Choose Import All New Photos or Import Selected.
- To delete files from the device after import, check the “Delete items after import” box before importing(Photos doesn’t ask this after the fact, unlike iPhoto).
After Importing and Ejecting Devices in Photos for Mac
Once you’ve finished importing photos, Photos will take you to the Albums view showing your most recent import.
To safely eject your camera or SD card, you’ll need to return to the Import view, where you’ll find the Eject button in the top-left corner.
Alternatively, you can eject your device from the sidebar. If the sidebar isn’t visible, go to View > Show Sidebar to reveal it.


